The process to launch a firewall within the Rapid Access Cloud is simple and easy to perform. After the initial technical meeting, you will confirm with your firewall vendor the type of firewall to purchase.
Once you obtain the license from the firewall vendor, the VFS team at Cybera will build the backend needed for you to launch and operate your virtual firewall instance. Here is an overview of what the VFS team does prior to launch:
- Grant the relevant flavor(s) and image(s) to your VFS project;
- Build the network and the ports;
- Produce the necessary documentation and assistance in setting up a VFS instance (support will not be provided for the firewall itself).
Using Horizon
Horizon is the graphical user interface of OpenStack, which allows you to interact with VFS on the Rapid Access Cloud, provided by Cybera.
The interface is fairly simple to use. Typically you will only use the "Compute" tab, from where you will launch and destroy instances.
In this wiki, Rapid Access Cloud dashboard refers to the Horizon interface.
Flavors and Images
Within the Rapid Access Cloud, there is a selection of Flavors and Images that can be accessed:
- Flavors are defined as the compute capacities of CPU, memory, and storage for virtual machines in OpenStack.
- Images are files of an operating system that are used to create or rebuild a server.
In the Rapid Access Cloud, you will have your own flavor and image, depending on the firewall vendor chosen:
- For Palo Alto, the flavor name is prefixed with "f1"; for Fortinet the flavor name is prefixed with "f2";
- Flavor size can be small, medium or large, depending on firewall type, and have specific RAM and disk space allocated, according to the vendor recommendation.
For example an f1.medium instance indicates a medium Palo Alto instance and an f2.large instance indicates a large Fortinet instance.
You will be granted the appropriate image during on-boarding, based on the choice of firewall.
Firewall Images Available on RAC
Please review this link for the list of firewall images currently available on RAC from the vendors we support.
Launching a VFS Instance
The Rapid Access Cloud dashboard is the primary means of maintaining a VFS instance. With your Rapid Access account in place (see here to create an account) and the backend work completed by the Cybera VFS team, the steps below show how to launch a VFS instance from the Horizon dashboard.
- Log onto Rapid Access Cloud dashboard via https://cloud.cybera.ca
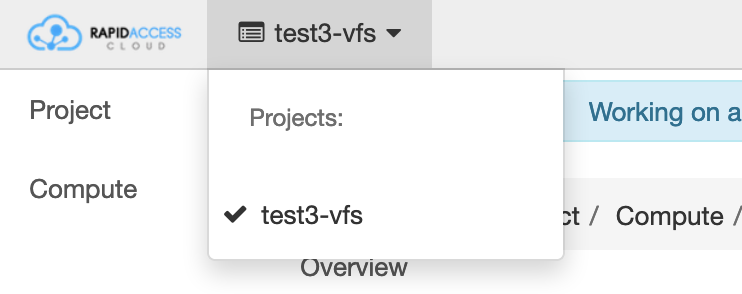
- In the very top left corner of the page, next to the Rapid Access Cloud logo, ensure the proper project is selected
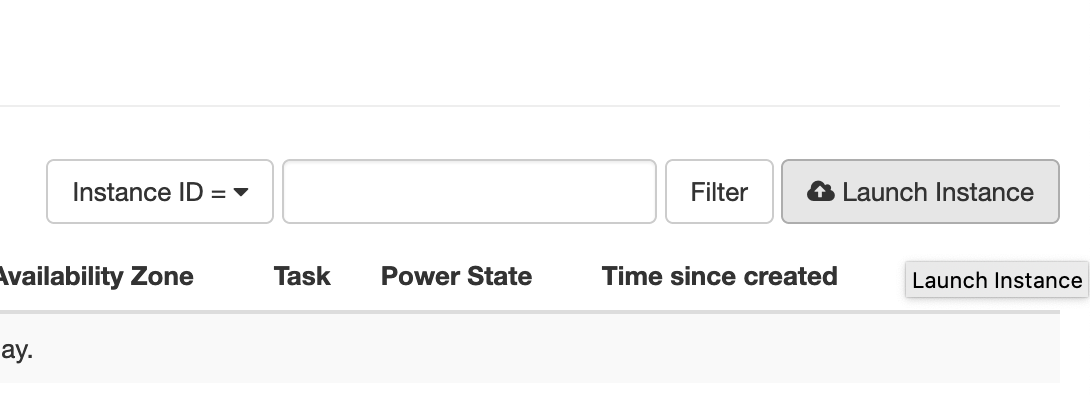
- On the side, click on “Compute”, and then “Instances” under it.
- Click on the “Launch Instance” button to start making a VFS instance. You will see the following menu
Give the instance a name, and choose the appropriate flavor. Depending on the virtual firewall of your choice, the corresponding flavor should be chosen for the instance. See the table below to identify the right flavor for your virtual firewall:
Palo Alto Firewall Flavor Fortigate Firewall Flavor VM-100 f1.small VM-02 f2.small VM-300 f1.medium VM-04 f2.medium VM-500 f1.large VM-08 f2.large 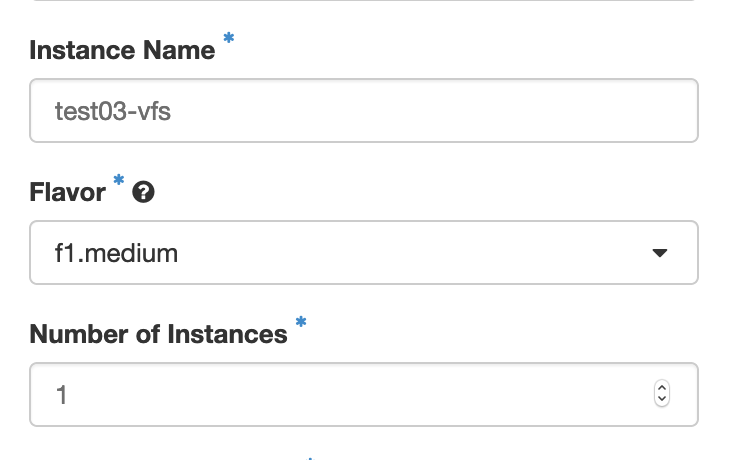
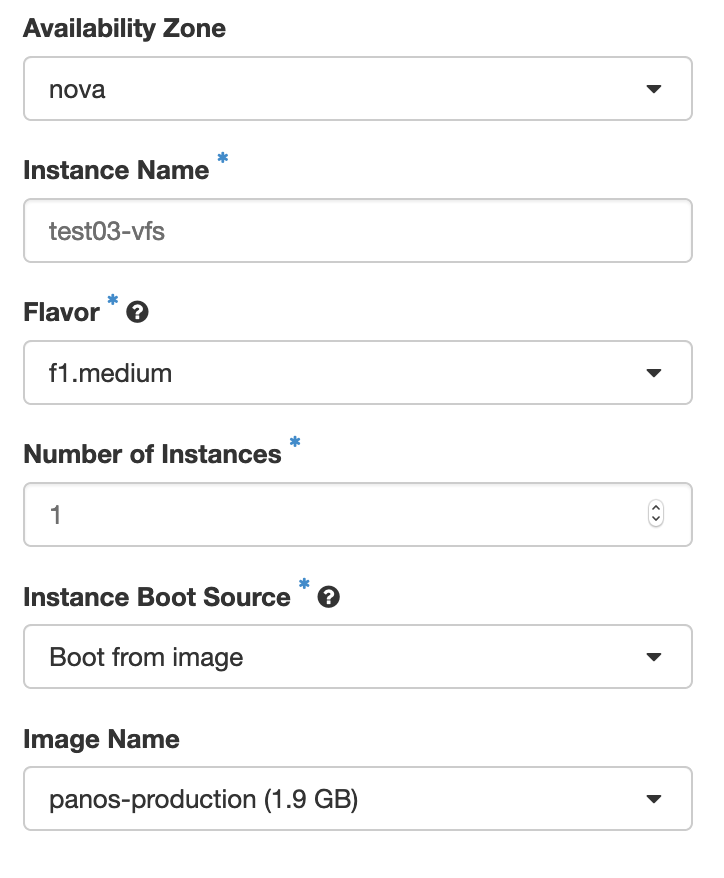
In the example above, the name test03-vfs has been given to the instance, and the flavor (f1.medium) indicates it is a Palo Alto instance.- Click on ‘Select source’ and select “Boot from image”.
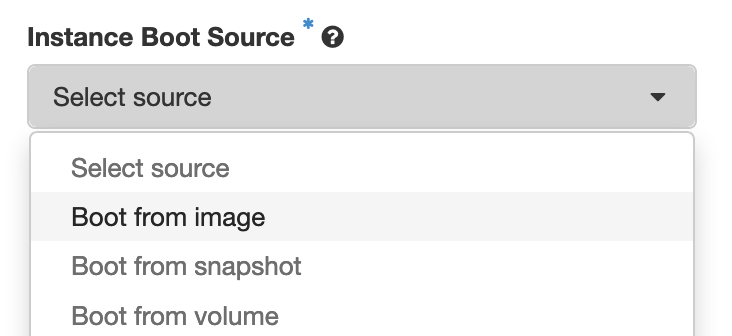
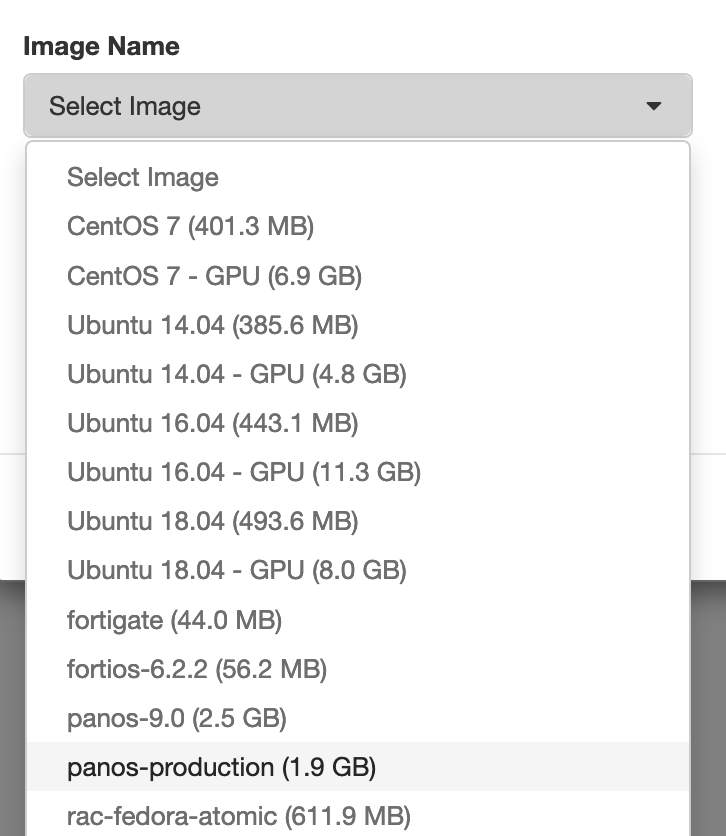
- Then select the appropriate image (panos-production in the example below):
- Check your options after you’ve picked what you wanted:
- Under “Networking*” tab, select only "default":
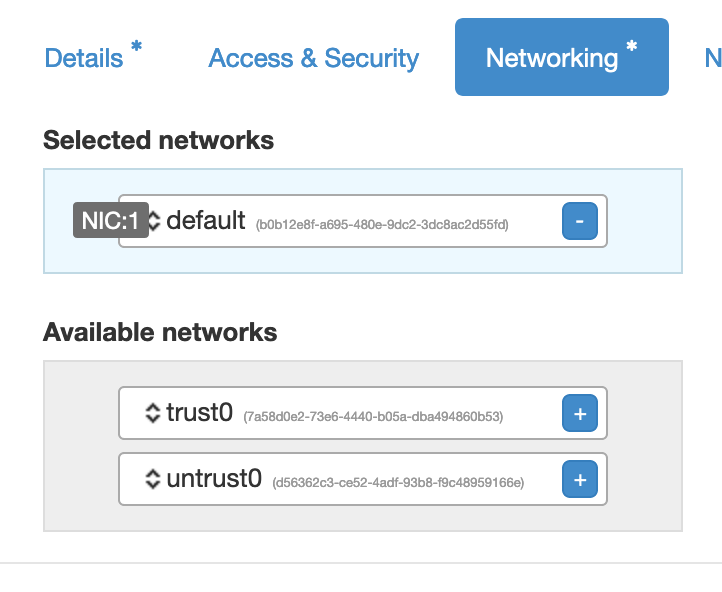
Under “Network Ports” tab, check both trust0_port and untrust0_port:
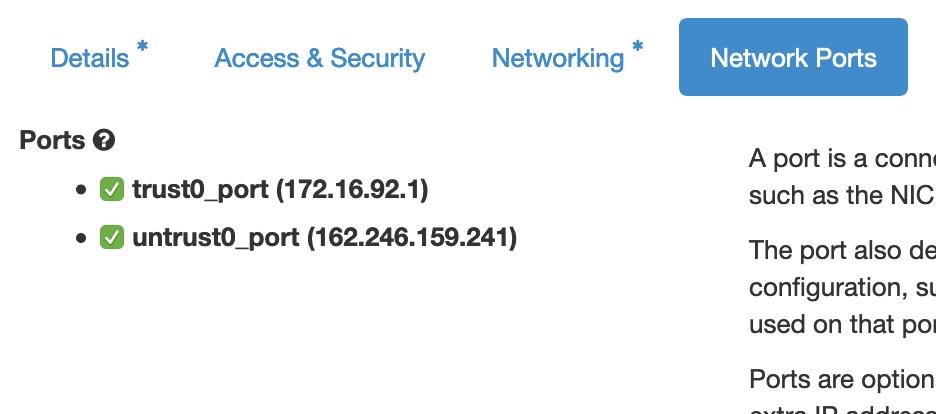
The ports will be added to the firewall and will appear in the firewall's operating system in alphabetical order. This means that the
trust0_portwill be listed before theuntrust0_portin the firewall's operating system.If you are importing an existing firewall configuration, you might have to rewrite the configuration or reconfigure your firewall to change the order of the ports accordingly.
- Then click on "Launch" in the bottom right of the window, and wait. This process could take a few minutes, then after completion, the following menu should appear:

At this point your VFS instance is ready. You can then use a VPN to connect to it and then either SSH using the default management IP, or open a web browser and add “https://<default IP> and then hit enter. See the Access and Maintenance of Your Virtual Firewall section.
FortiOS 7.x
For fortigate VMs launched from FortiOS image version 7.x, management access through http is not allowed by default, as was the case for earlier versions. As such, additional configuration via SSH is required before the web GUI is accessible. Make sure your RAC VPN is connected, and do the change as follows:
% ssh admin@<default/management IP>

# config system interface

(interface) # edit port1

(port1) # show

config system interface
    edit "port1"
        set vdom "root"
        set mode dhcp
        set allowaccess ping https ssh fgfm
        set type physical
        set snmp-index 1
    next
end

(port1) # set allowaccess ping https http ssh fgfm

(port1) # show

config system interface
    edit "port1"
        set vdom "root"
        set mode dhcp
        set allowaccess ping https http ssh fgfm
        set type physical
        set snmp-index 1
    next
end

(port1) # end
Once this is done, you can go ahead and access the fortigate web GUI.
- (Optional) If a configuration needs to be uploaded from a backup, make sure the ports on the newly launched firewall and in the backup configuration match, otherwise the backup configuration should be edited based on new port assignments on the new firewall
Take note of the trust0 and untrust0 MAC addresses from the cloud side, using RAC portal (horizon) as shown in the example below

- Find out which ports on the new firewall have the MAC addresses discovered in (a)
- panos
- Web GUI
First, change the interface type for Ethernet1/1 and Ethernet1/2 to Layer3, and commit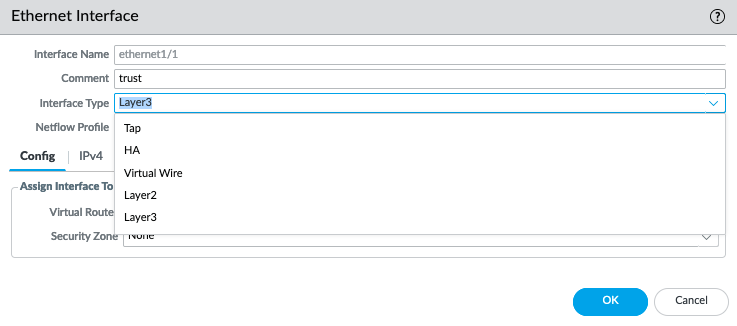
- Web GUI
Make sure the 'MAC Address' column is selected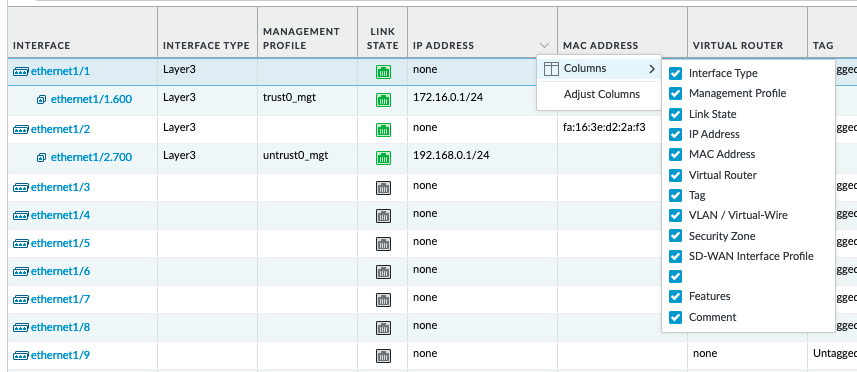
Then, you can see the MAC addresses as follows. Note, no need of configuring IP addresses to display the MAC.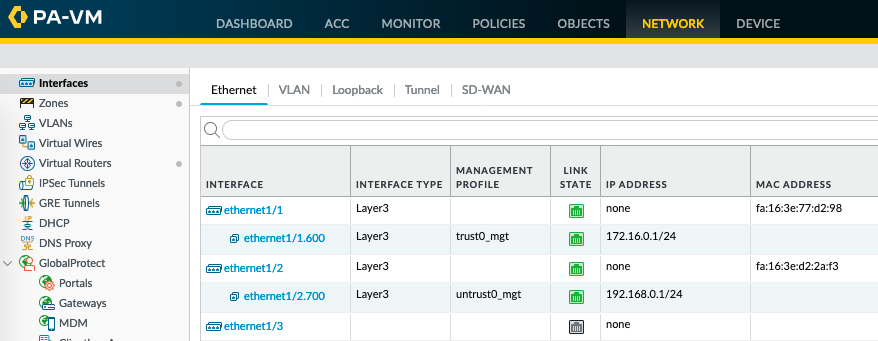
Command line (using horizon instance console or ssh to instance)
admin@PA-VM> show interface all

total configured hardware interfaces: 2

name                    id    speed/duplex/state            mac address
--------------------------------------------------------------------------------
ethernet1/1             16    10000/full/up                 fa:16:3e:77:d2:98
ethernet1/2             17    10000/full/up                 fa:16:3e:d2:2a:f3
- Web GUI
- fortios
- Web GUI
Go to the edit mode of each interface to check the MAC, as shown on the bottom right side below. This doesn't need any configuration changes in advance.
- Command line (using horizon instance console or ssh to instance)
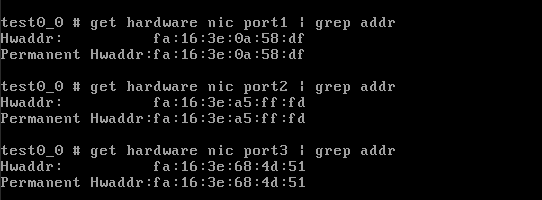
- Web GUI
- panos
- Cross check if the panos/fortios ports match with those in the backup configuration
- if the ports are similar, no further action is required, the backup configuration can be uploaded to the new firewall
- if ports are different, edit the backup configuration according to the new port assignment; then the configuration can be uploaded to the new firewall
Important Information regarding your VFS instance
Backup
The Virtual Firewall Service (VFS) is intended as a self-managed service, and Cybera does not perform backups of your firewall configuration.
See the How to Make a Backup of Your Virtual Firewall Configuration section for more details.
During a failover scenario, having at hand a copy of your firewall configuration will ensure that the service is restored in a timely manner. See the Handling Outages section for more information.
Licensing
We recommend you to keep at hand a copy of your firewall authorization code (authcode), if you are a Palo Alto firewall user, or a copy of your license file, if you are a FortiGate firewall user. For more information on how to activate your firewall license, please see the section How to Activate Your Firewall License.
Tokens
For Fortigate firewalls, if you are using the "FortiToken" functionality, then consult with Fortinet Support for the steps to re-host your FortiTokens. FortiToken keys are not transferred as part of the configuration backup and require involvement from Fortinet TAC to re-host on a new installation.
Deleting a VFS Instance
The Rapid Access Cloud dashboard can be used to delete a firewall instance, in case a given firewall needs to be re-launched or recreated: One scenario where this might be required is a failover event, see for instance the Handling Outages section.
Before deleting a firewall instance:
Make sure you have a backup copy of your firewall configuration.
For Palo Alto firewall, deactivate the license of the firewall before proceeding.
- For Fortigate firewall, if using FortiTokens, engage Fortinet Support regarding token re-hosting.
Once you have a backup copy of the firewall configuration and you have delicensed the firewall if you are using a Palo Alto firewall, follow the steps below to proceed:
Login to Rapid Access Cloud by choosing the correct region where your firewall is running;
Change the project to the vfs project at the top left corner (see Step 2 in the Launching a VFS Instance section above);
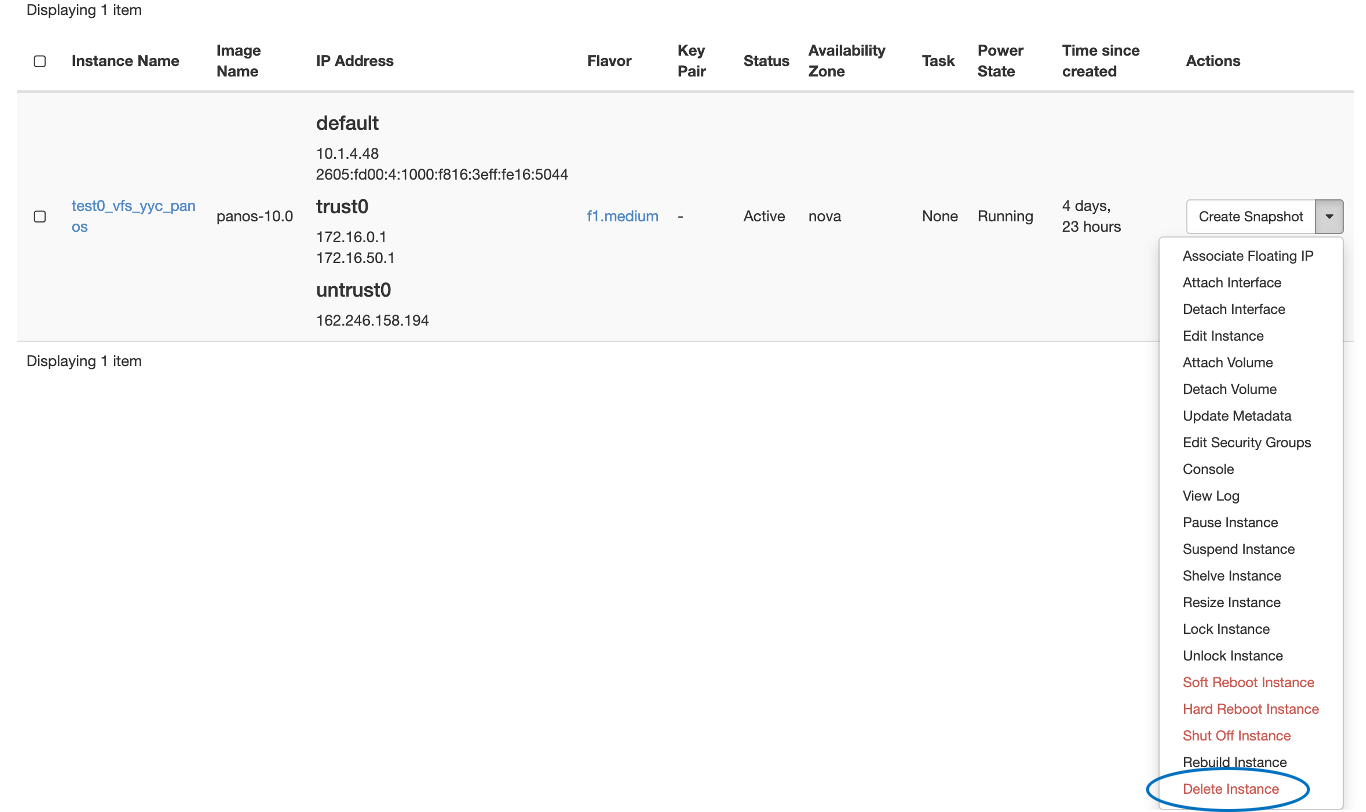
Click on “Compute”, and then on “Instances”, and from the instance Actions menu, choose “Delete Instance”, as shown below: