A Jupyter Notebook is an interactive document allowing you to develop, run, visualize, and share data science experiments. Heat is an OpenStack project which helps facilitate and automate multi-step tasks.
The combination of the two will allow you to begin working with Jupyter very quickly in the Rapid Access Cloud.
Deploying Jupyter in the Rapid Access Cloud
- Login to the Rapid Access Cloud at cloud.cybera.ca. If you do not have an account, register at rac-portal.cybera.ca
Create a volume to be attached to the new instance. Click on the "+ Create Volume" button on the left hand side under Compute → Volumes. All Jupyter data will be saved in this volume.
If you previously walked through this tutorial and you already have a volume with your data, you do not need to create a new volume. You can use your existing volume and you will have access to your existing work.
- Create a Key Pair. If you already have a key pair, you can skip this step.
- Click on the "+ Launch Stack" button under Orchestration → Stacks.
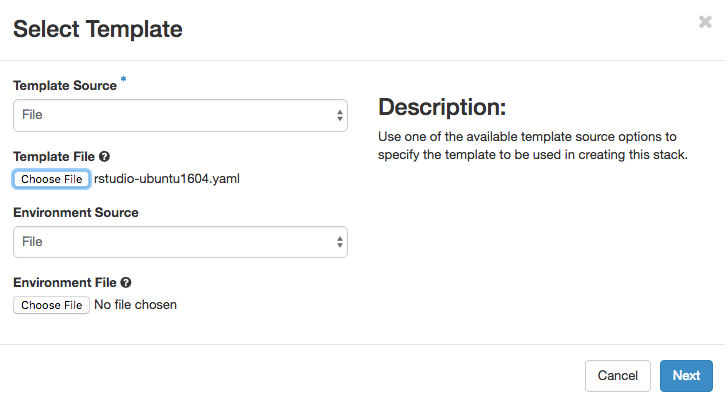
Select URL in the drop-down menu for Template Source. In the Template URL field, paste the following url:
https://raw.githubusercontent.com/cybera/rac-heat-templates/master/jupyter-ubuntu1804.yaml
You do not need to input an Environment File. Click Next to continue.Enter parameters for the new stack. For Password for user, enter your Rapid Access Cloud account password. For "reate password for Jupyter, enter a password for the Jupyter application of your choice.
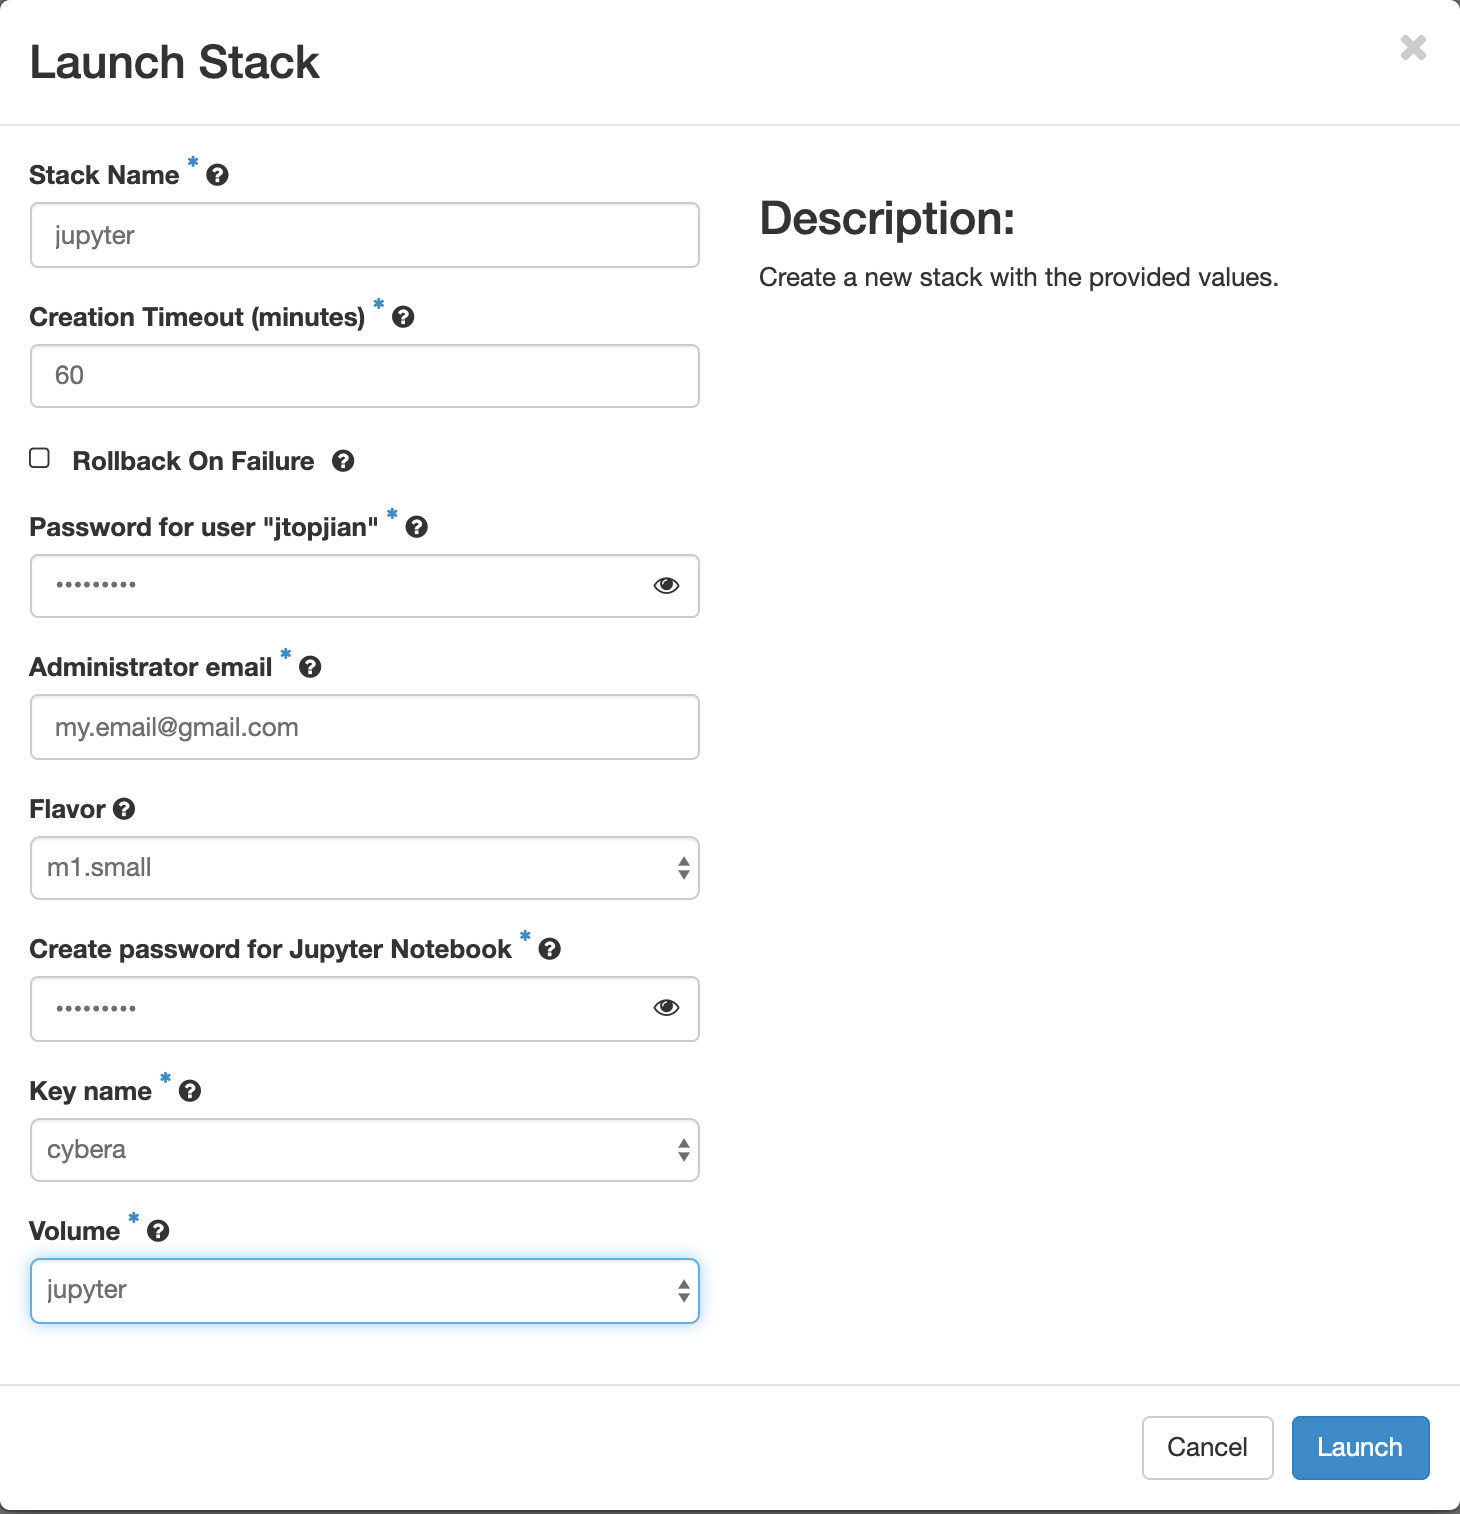
Click Launch
The stack will complete in just a minute or two. However, you will need to wait an additional 5 minutes for the entire process to complete internally.
Using Jupyter
You can access your Jupyter environment either via IPv4 or IPv6.
IPv6 is preferable. To check and see if you are on an IPv6-enabled network, see here.
If you aren't on an IPv6 network, you will need to Associate a floating IP address to your Jupyter vm.
Once you have confirmed if you have IPv6 or if you associated a floating IP, the next step is to find the DNS name of your instance. To do this, click on the Compute → Instances menu item. Your Jupyter instance should be the first item in the Instances / Virtual Machines table, and includes the name jupyter-. Click on the instance to view its details.
On the details page, look for the Metadata section. In this section, you'll find the dns setting:
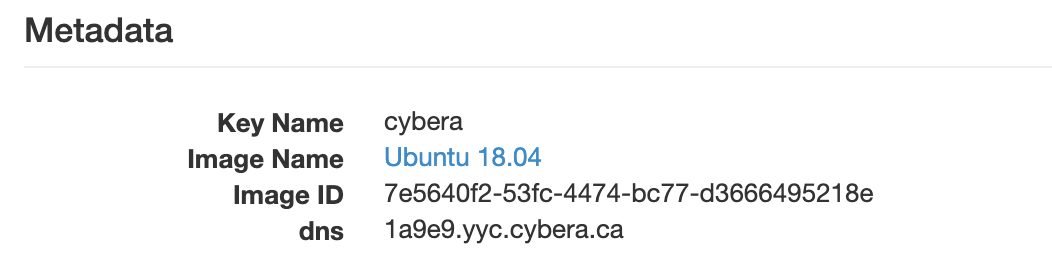
Copy and paste the value into your web browser, using https. For example, the above DNS setting would translate to https://1a9e9.yyc.cybera.ca.
You should see a login screen for Jupyter. Type in the password you set during the initial creation wizard.
At this point, you should be logged in and can now proceed to use Jupyter!